gameBOI
Table of Contents
Overview
I wanted to make a project to help show off my design capabilities to potential employers I was interviewing at for my PEY, so I decided that a small handheld game would be a fun way to do so and make a nice impression. I started this just before May started and had my first interview on the 10th, so I had to rush!
I decided to try and keep the design simple to minimize cost and development time, so simple inputs and outputs were used, as well as a known and tested microcontroller I was familiar with at the heart of it all.
In the end I had a system with 32 LEDs acting as a display, with the user’s input limited to two buttons. The system had initially just three games (now seven!) and the ability to store high-scores in non-volatile memory.
Requirements
- Play a game
- Run off a battery
- Be entertaining
- Portable
Objectives
- Offer multiple games
- Store high-scores even when powered off
Takeaways
- This was my first time properly embedding a microcontroller in a design/board and it fortunately wasn’t as frightening as I thought. I will look forward to embedding many more microcontrollers to come!
- The assembly process using surface mount technology is quite interesting and presents its own benefits such as easier component placement and smaller components which is especially beneficial in portable projects. However it has drawbacks such as greater difficulty probing lead directly or performing visual inspections for shorts.
- Several of my initial units did not function as intended. Some flat out not responding to anything, while others had issues such as quadrants of their screens malfunctioning. After inspecting and trying to diagnose the cause of each faulty unit, it appears that most issues seem to stem from my novice workmanship. This will hopefully improve with more practice.
- Double check Bill of Materials before purchasing components to not forget components, like 10k resistors!
Detailed Report
This was a little handheld game console, where two rows of 16 LEDs each are used as a display and the user has two buttons for input. This was a project I undertook largely out of interest, but it also served as a good introduction to basic embedded microcontroller design and surface mount circuit design and assembly.
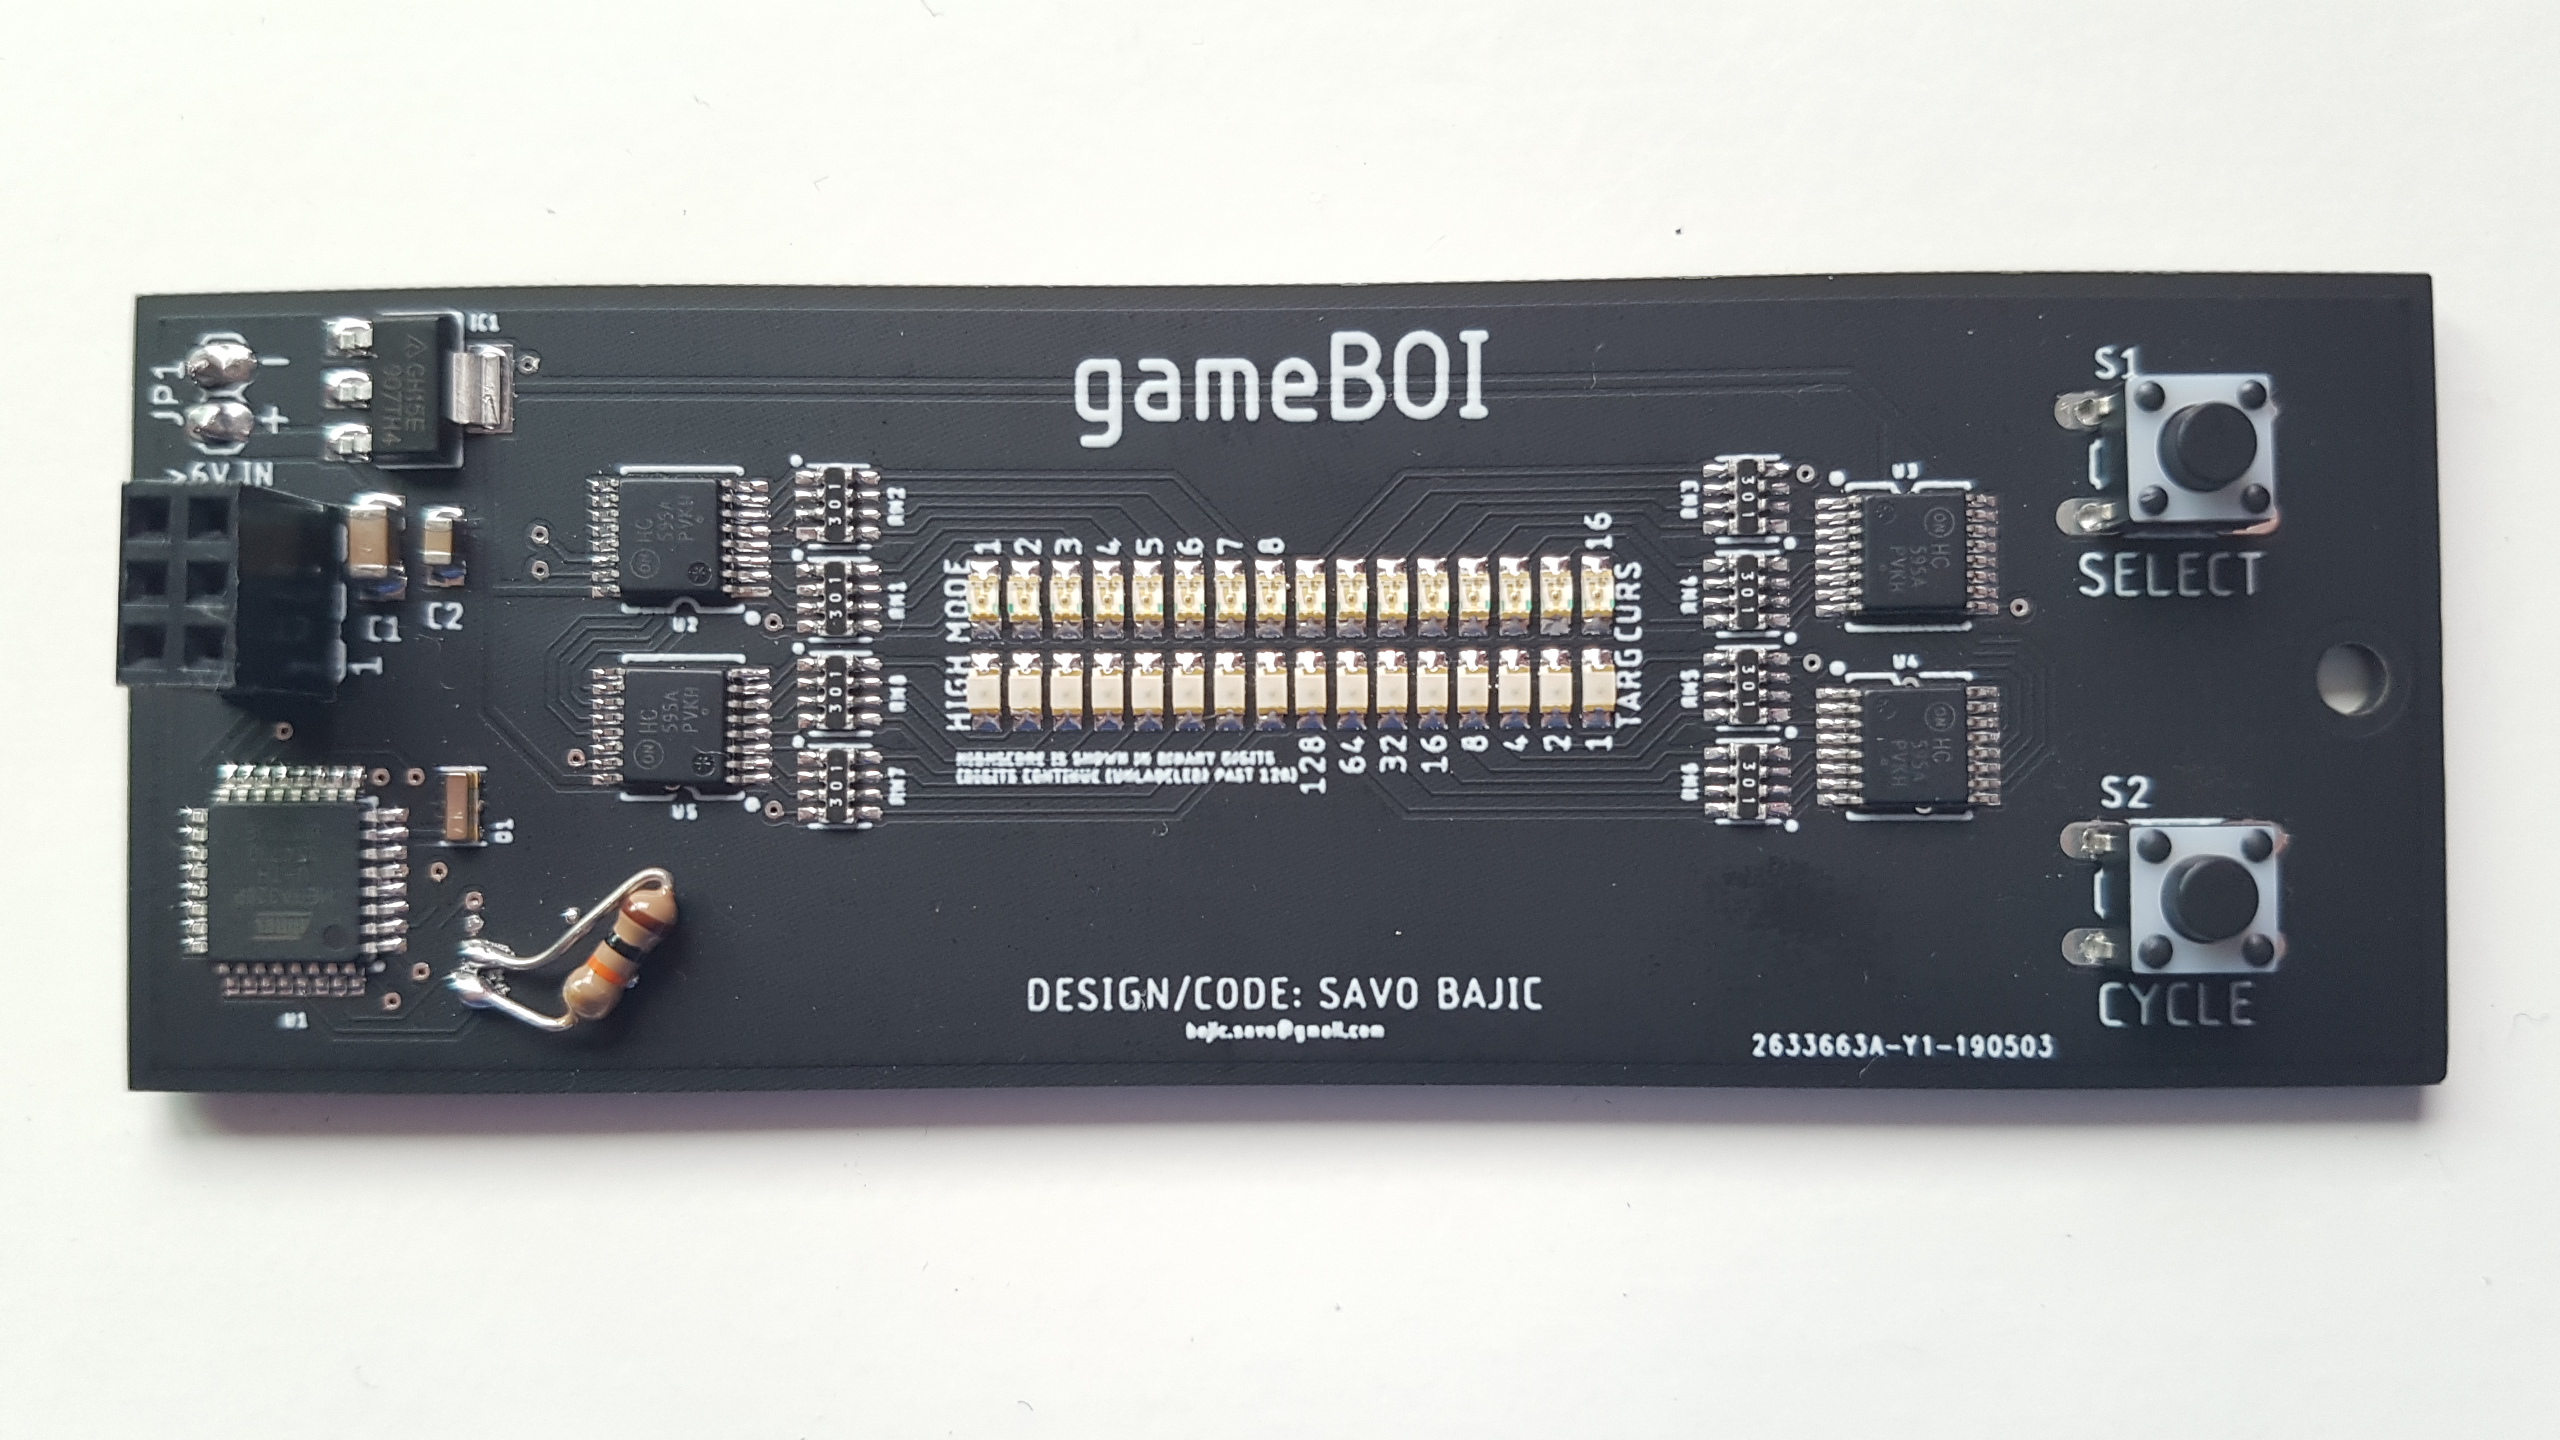
The result was a small (35mm by 100mm) circuit board that had 32 LEDs (in two rows) as a display and two buttons for user input. The system was controlled using an ATMega328P microcontroller, the power is delivered by an external source which goes through a 5 V linear regulator. On the software side of this project, the system currently has 7 different game modes, the ability to store high scores in non-volatile memory and enter low power sleep states.
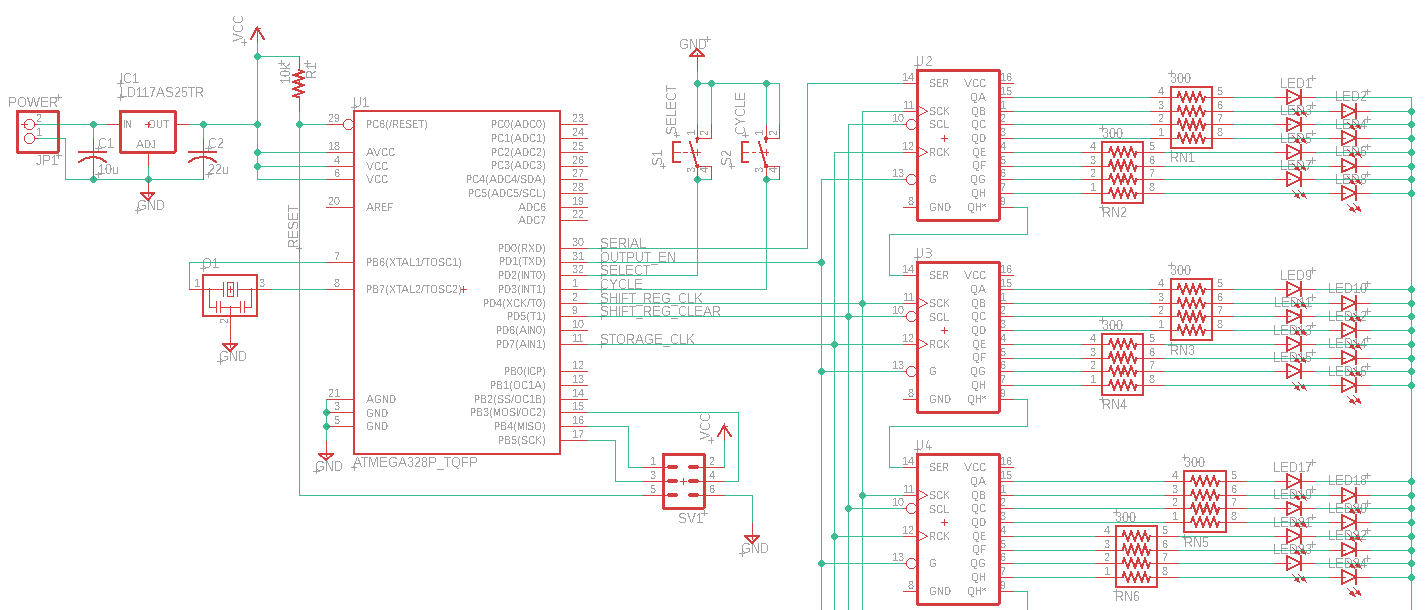
The circuit design is straightforward, the heart of it is the ATMega microcontroller which processes the button inputs on its interrupt pins, and controls the LEDs using a serial interface to four discrete shift registers (each controlling a group of 8 LEDs). Below is most of the schematic, one shift register and its LEDs have been left out.
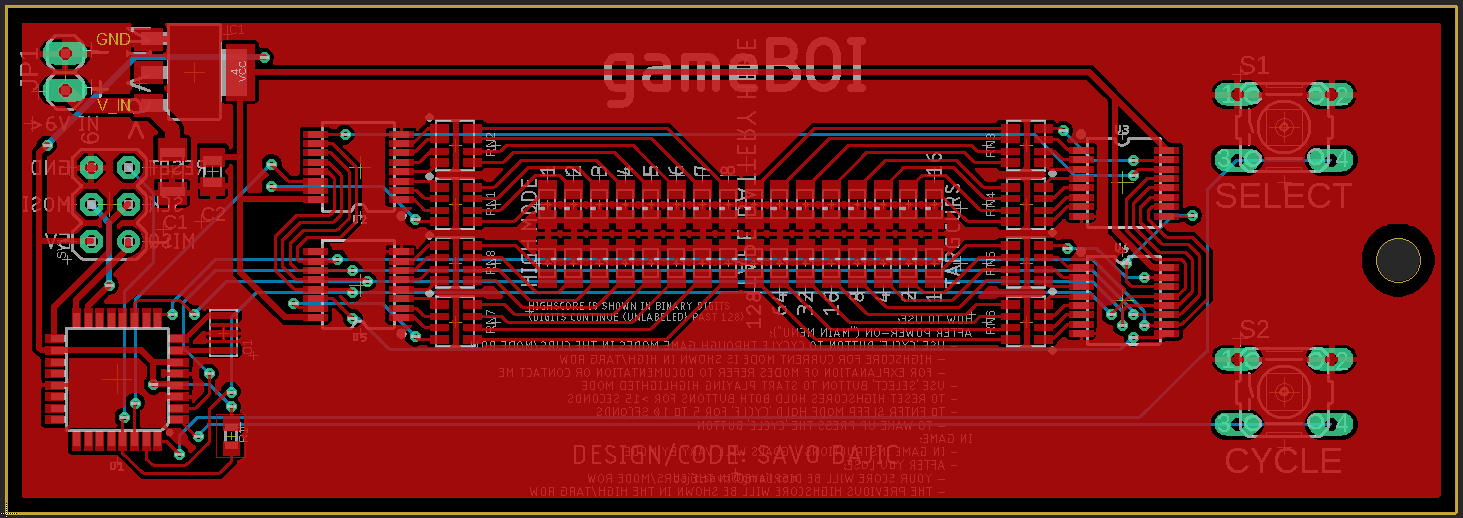
This was then turned into a printed circuit board layout without much difficulty due to the repeated parts of the circuit and few branching signals allowing most of the signals to be routed on the top layer.
Assembly was simple, I order a stencil for the paste which greatly expedited this process, allowing me to make the boards in series. I once made two within 40 minutes! I forgot to include one resistor in the initial order, so an equivalent through-hole resistor was used in the first few boards.
With the hardware sorted I moved to programming. This was done using the Arduino IDE as I had the microcontroller configured just like the one present in an Arduino Nano. The structure was a large switch in a loop and depending on the global variables used to store the state of the system, different functions would be called to work the display/process input in different modes.
I aimed to use as little memory and space to allow for as many potential game modes as possible. I used several methods to optimize my code for this including but not limited to:
- Using shared functions that can be called to reduce redundant code. For example, all the game modes called the same function when moving the cursor or when a game was over.
- Using smaller variable sizes, such as bytes when I knew variables or constants would be less than 255.
- To control the LED status an unsigned long (4 bytes, 32 bits) had its bits manipulated to correspond to each of the 32 LEDs, instead of a 32 element Boolean array which would require 32 bytes.
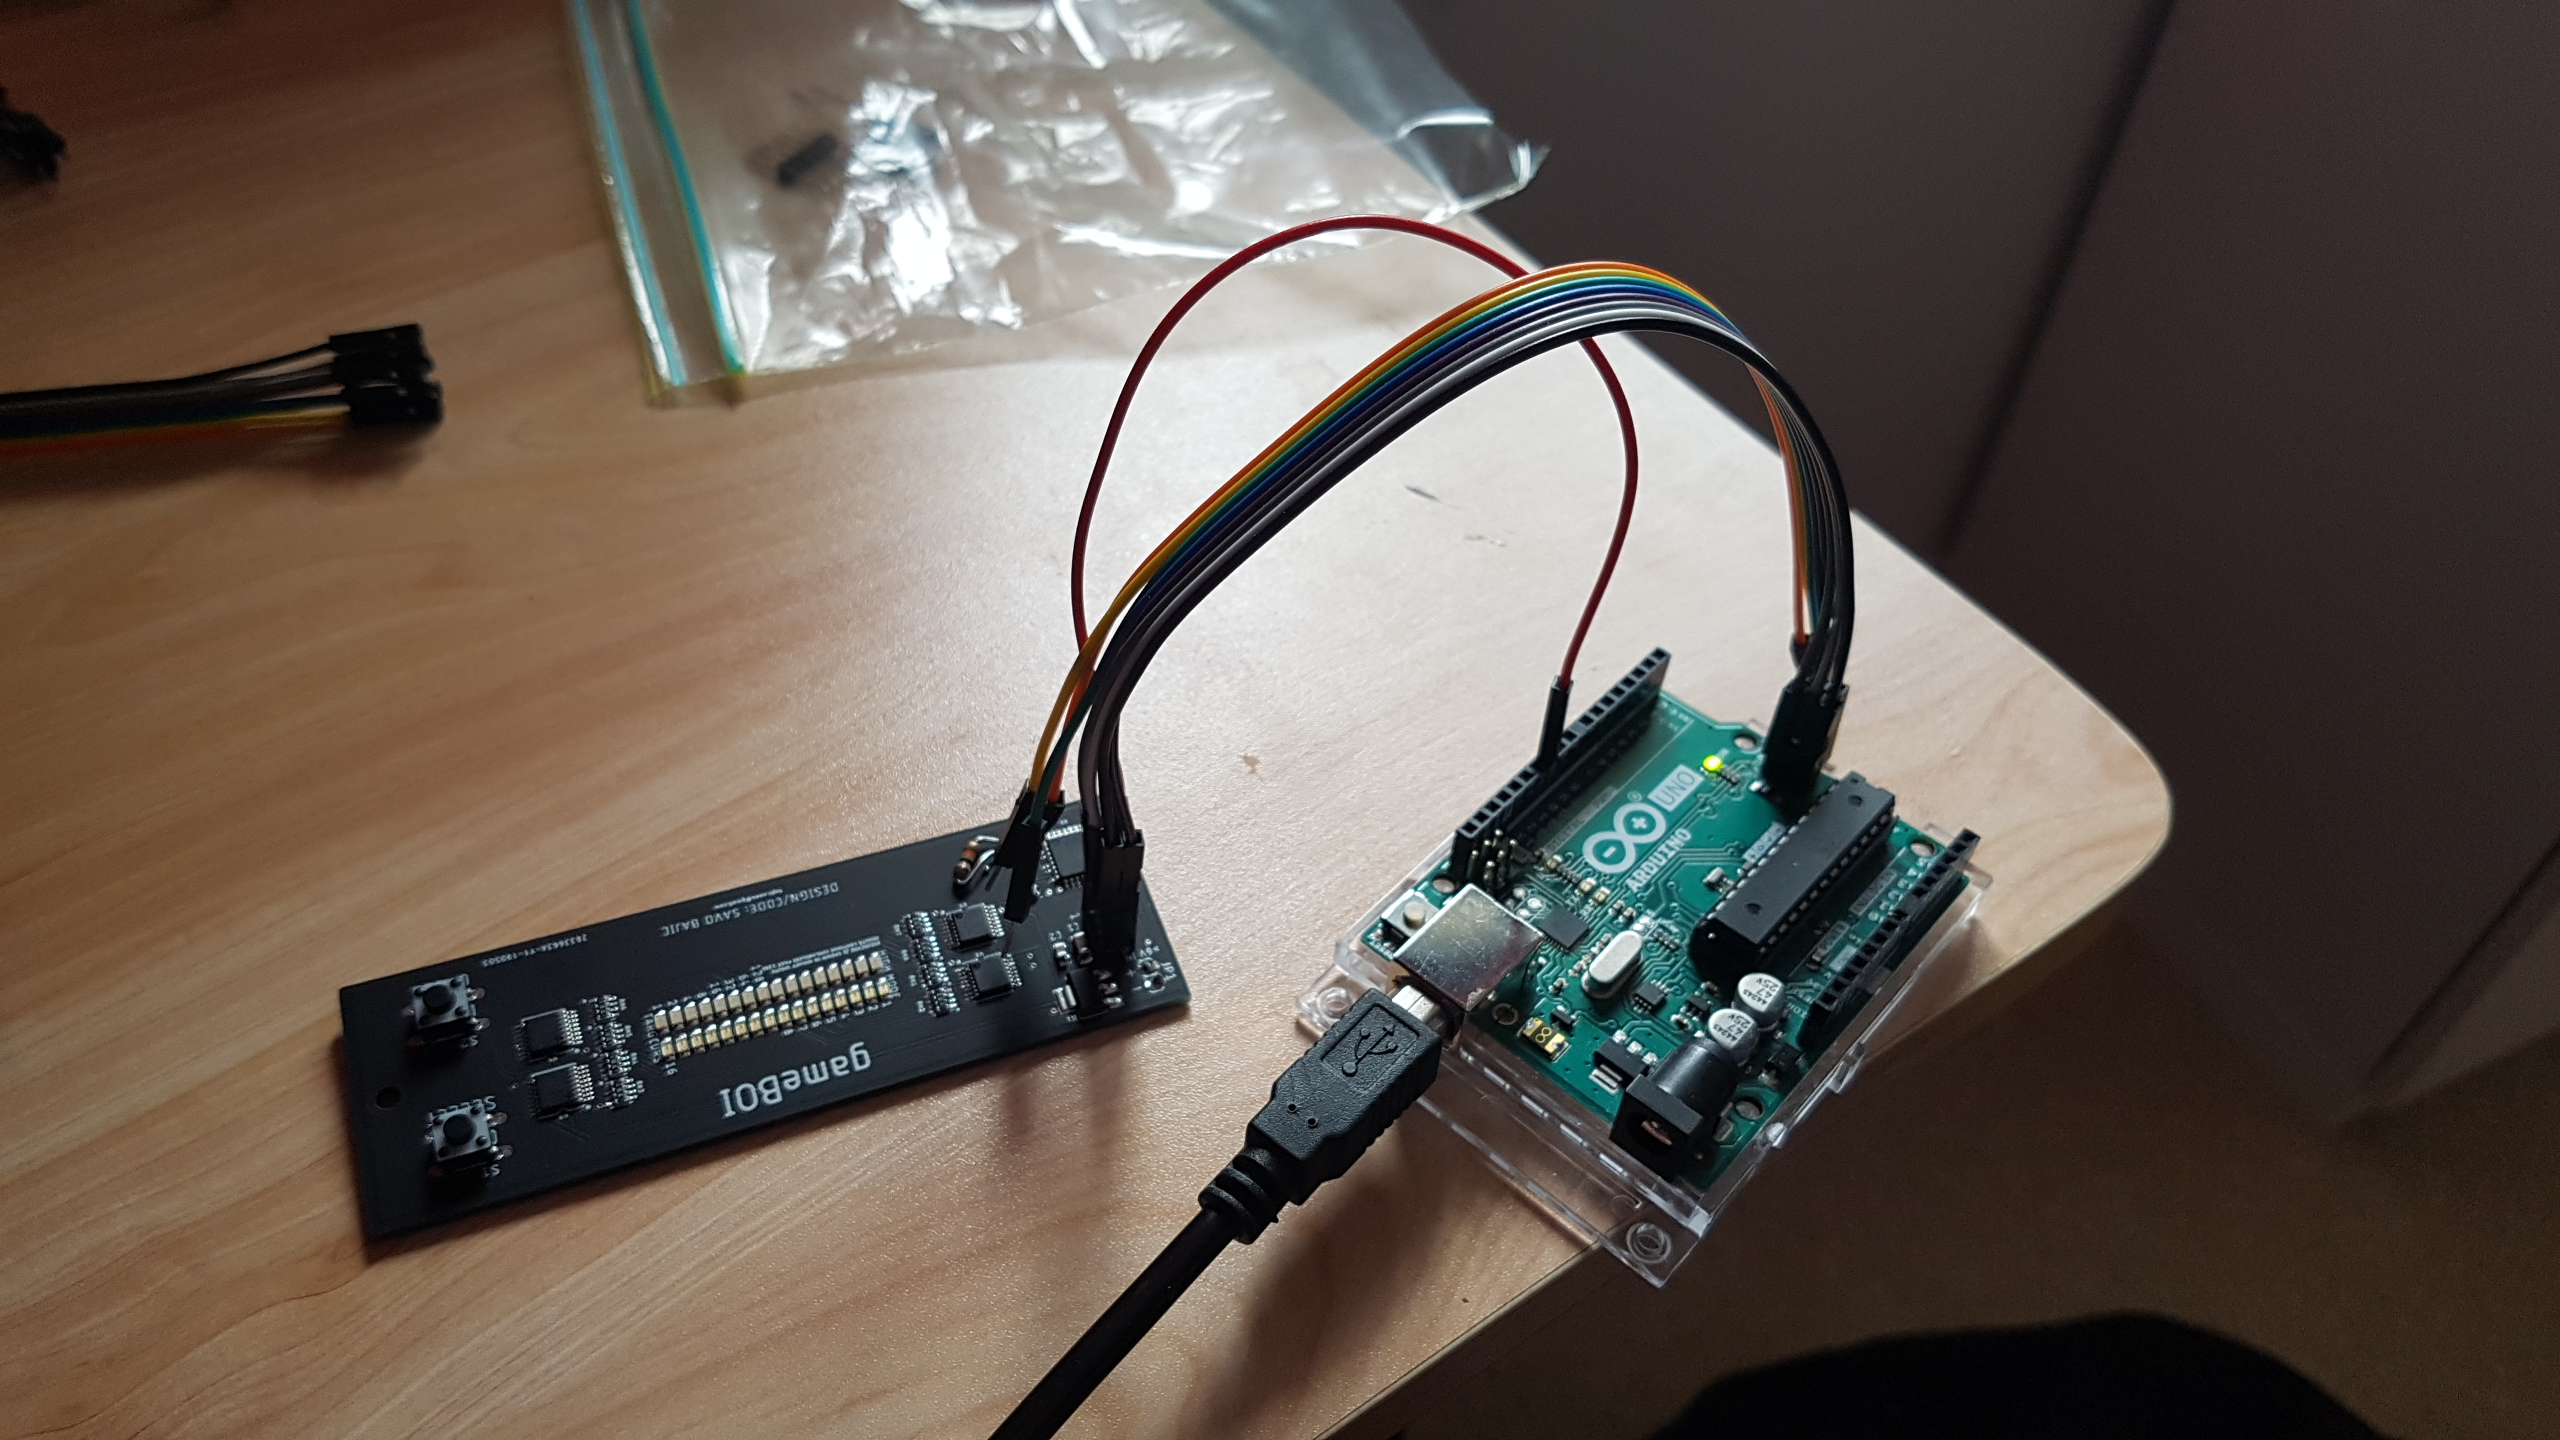
Uploading the code to the boards was done by using another Arduino I had as an in-system programmer (ISP) by connecting the I2C headers of the two boards, along with a separate line for resetting the gameBOI. I then uploaded the code using the “Upload with programmer” option in the Arduino IDE.