Ornaments
Table of Contents
Overview
I wanted to make something small and simple (read: cheap) to hand out to friends and family for the holidays, and I felt that a small blinking ornament would be perfect for this. LEDs and resistors are cheap and hardy, batteries and a basic control system would be manageable.
In the end the circuit was nothing more than a basic 555 timer based blinker running off a 9 V battery. I ordered panelized boards to have plenty to hand out and hand soldered them all.
The reception was good all round, so I might redo these again!
Requirements
- Have blinking lights
- Not cost more than $5 a unit
Objectives
- Cost less than $3 a unit
- LEDs to be visible in daylight
Takeaways
- Trinkets are good way to show off to non-technical people in your life.
- 9 V batteries are convenient power sources, but bulky, heavy, and unsightly really - which is not desirable for hanging in a tree.
- Bright lights are good, but batteries have a finite amount of energy so I should have made them dimmer.
- Batteries only lasted about two days.
- Could have string LEDs in series to use the same current.
- Practised hand soldering surface mount parts
Detailed Report
Since I had picked up electronics as a hobby, about two and a half years before I started this project I had difficulties trying to show and impress my mom and some of my non-technical friends with my projects since other than the gameBOI I had nothing that could operate on its own, like the stuff I did for HPVDT all needed the vehicles to gather the data from. Even the gameBOI was a bit daunting since it wasn’t intuitive how to operate it.
I also wanted to make a present for a bunch of my friends so I had the idea to kill two birds with one stone and make a nice electronic ornament for people. It would be simple and cheap, but its purpose was clear so you didn’t need to explain what it did or how to operate it when giving it out.
Circuit Design
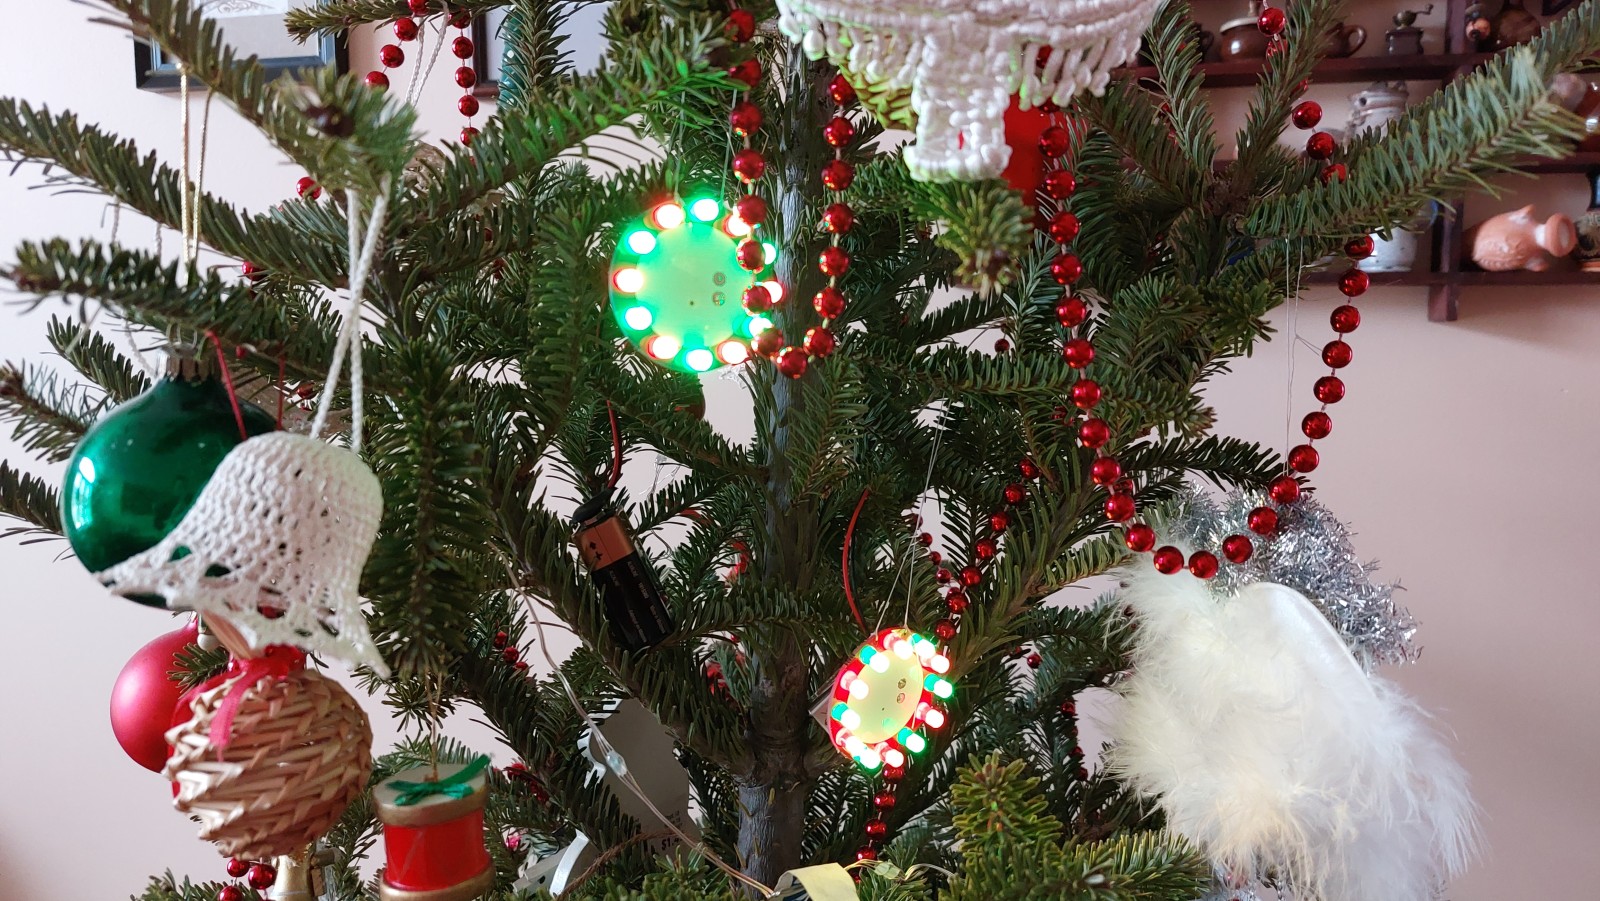
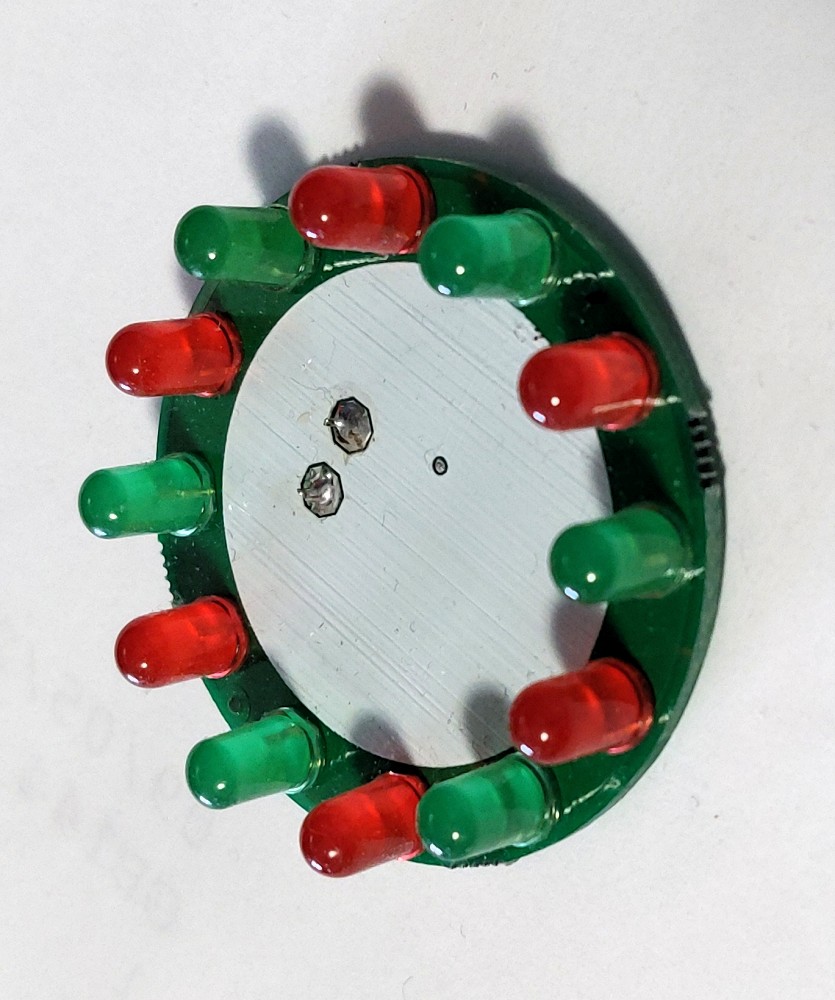
I wanted to have a dozen LEDs on the ornament, with half always on and the other half blinking away at some slow frequency. I wanted to use the common “gum drop” through hole type of LEDs common with DIY kits since I believed they would look nicer and cozier than some SMT ones. I also decided that a 9 V battery would be used for the power since it was a common battery that supplied a decent voltage in a single unit.
All that remained to design was the blinking system, so I turned to everyone’s favourite IC, the old reliable 555 set to run in astable (free-running, oscillating) mode. Not only was the 555 timer a good choice for keeping the circuit simple and reliable, it also was able to drive the “high” power output directly so no additional transistors were needed. Thus the component count would be kept low.

My choice of passives resulted in the blinking lights being on for about 1.8 seconds, and off for 1.4, which I felt was just the right rate to not be too attention grabbing nor too “slow”.
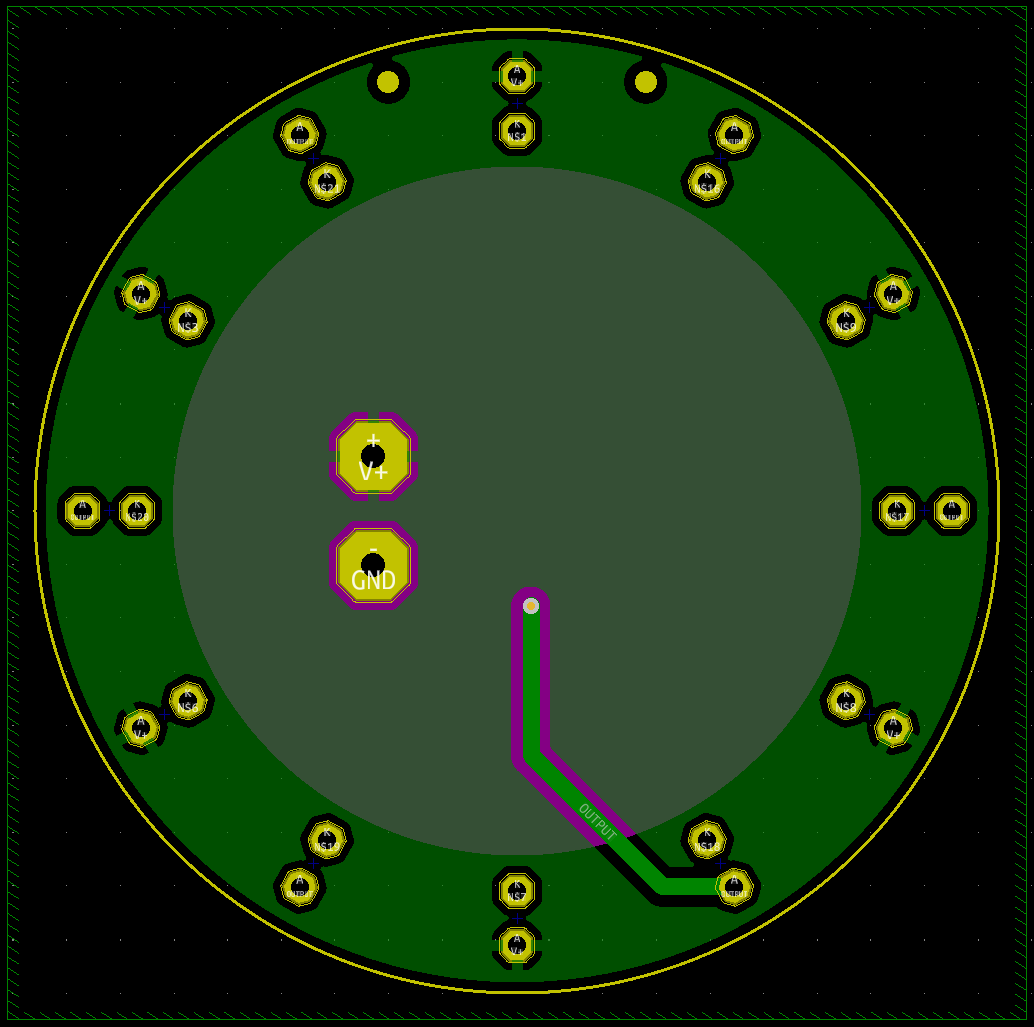
Layout
Layout was pretty basic, I put the 555 in the middle with its components and then arranged the LEDs around the perimeter of the circle. This was the first time that I used part orientations on a circuit board other than some multiple of 90°, since I was putting the LEDs in increments of 30°.
To make the ornament function as a better ornament, I put a circle of silkscreen in the middle so I could write messages to people on them and also added two small holes at the top to put a string through to hang it up. The final size ended up being 45mm in diameter.
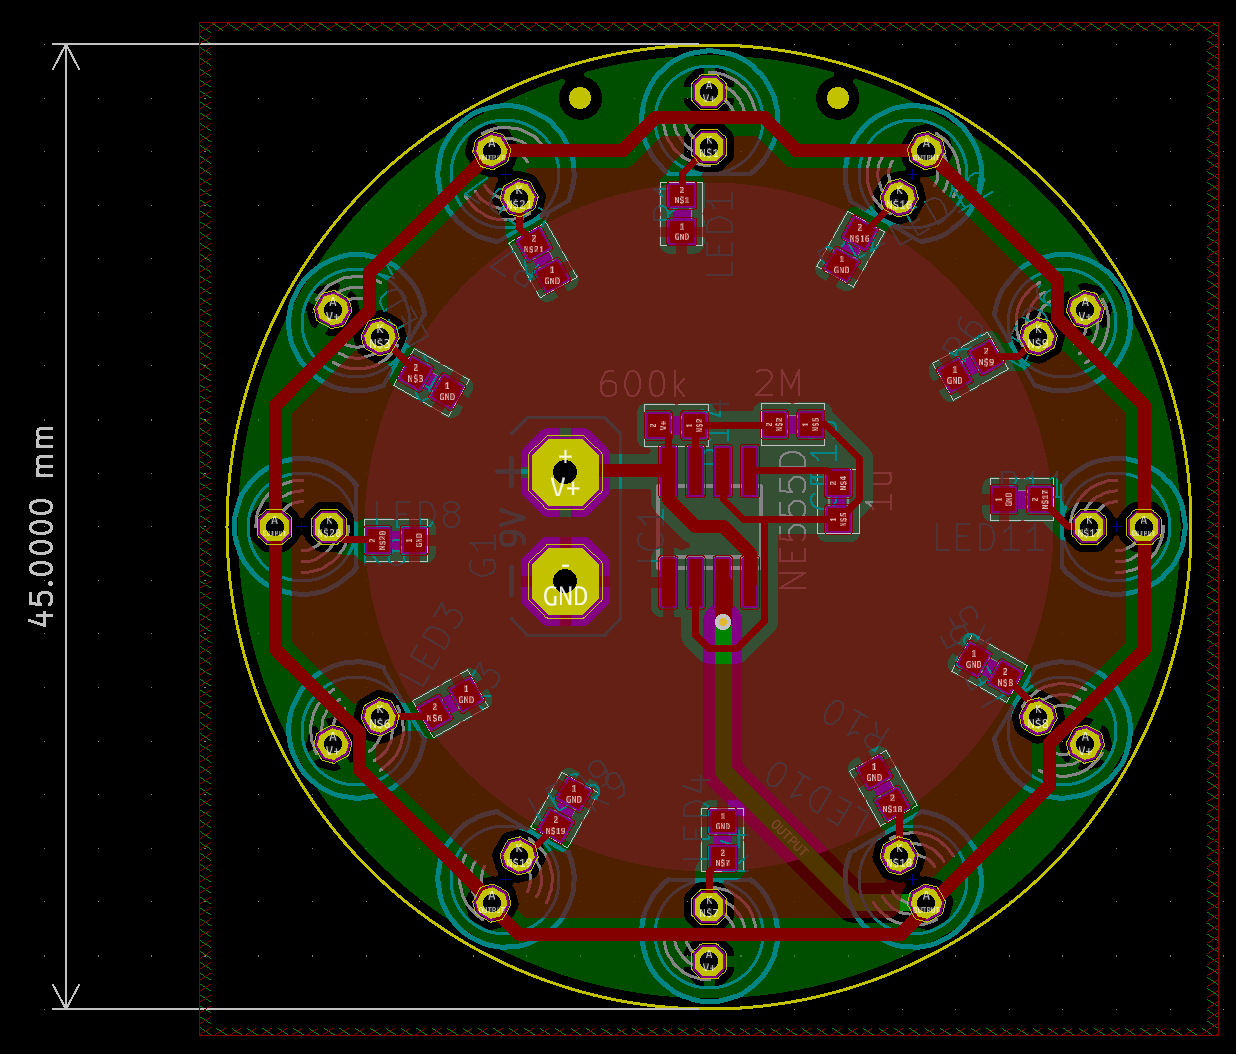
The top of the board is where most of the traces were made and all components were placed. I had the 555 sit in the middle so a ground pour could reach all around for the LEDs.
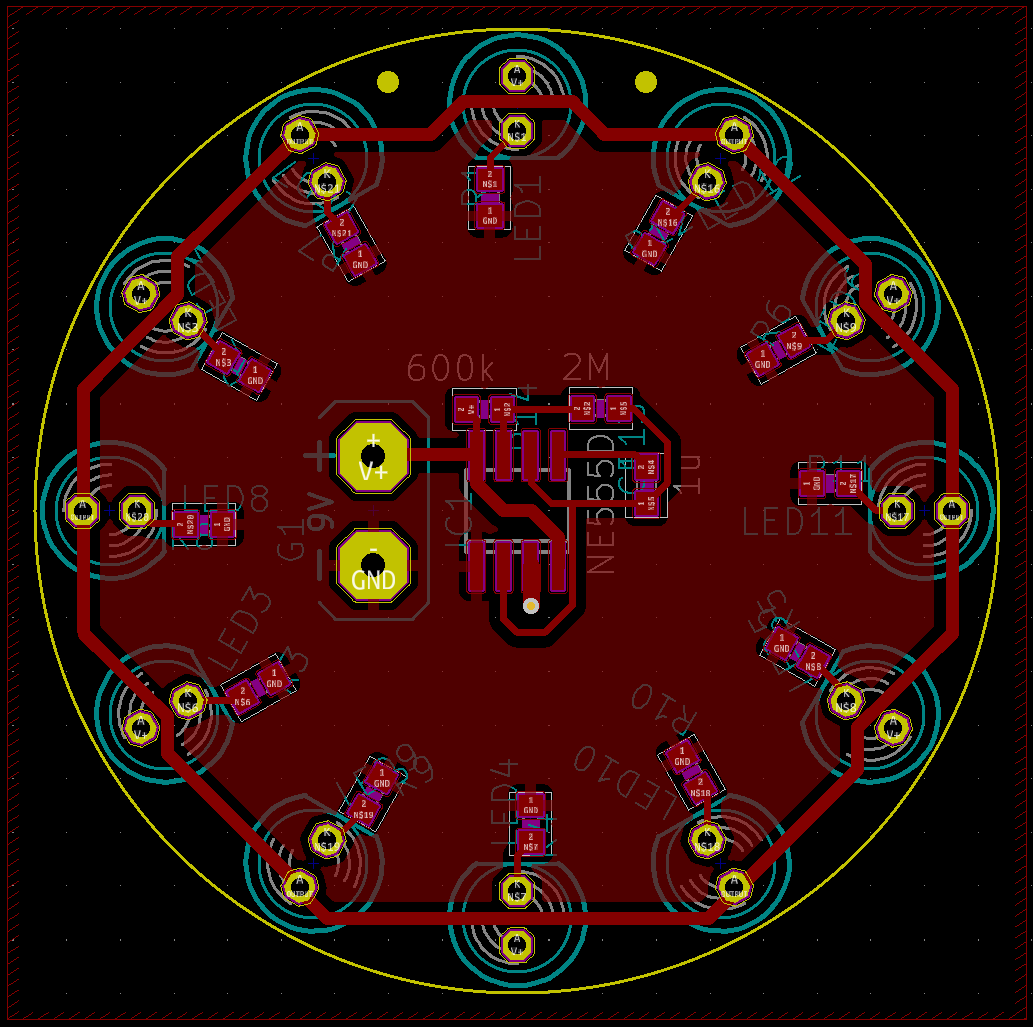
I kept the bottom bare of components so that I could easily leave a message in the middle on the silkscreen circle. Although “placed” on the other side I was actually going to solder the LEDs to face out this side.
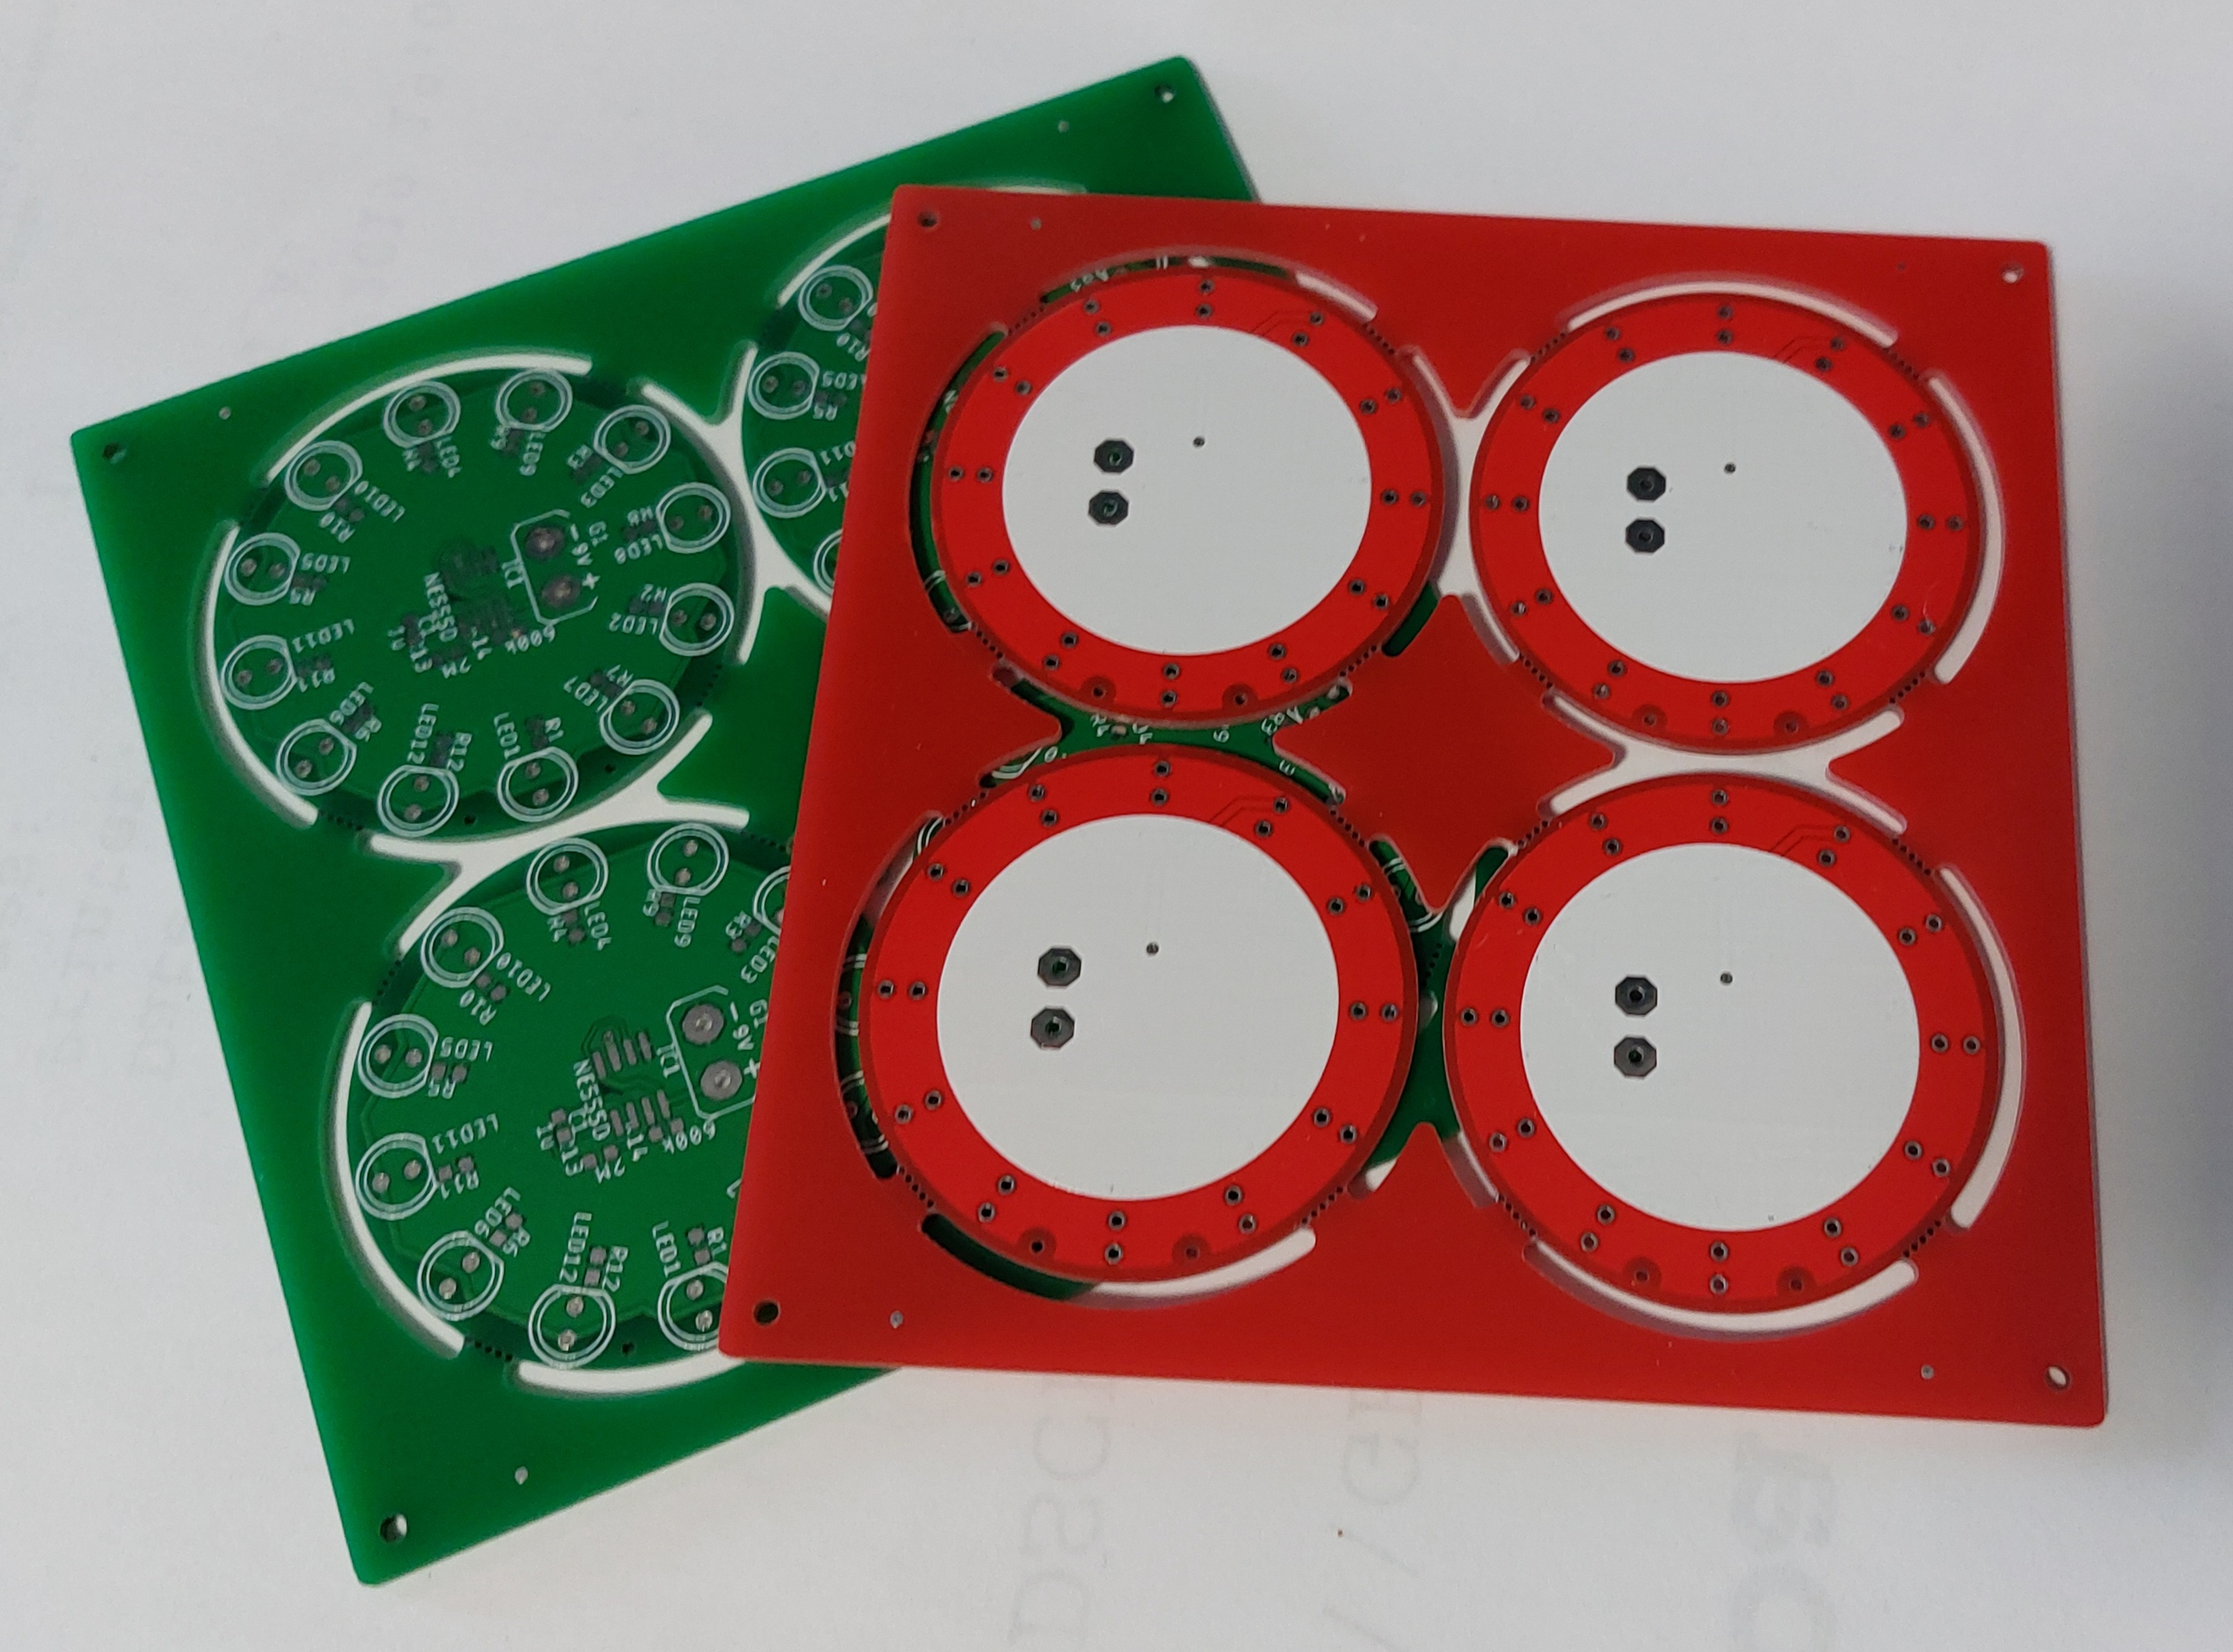
Panelization
I did not do this myself. I ordered the PCBs to be panelized by the manufacturer, JLCPCB. I did this so I could get many more boards at basically the same price since the ornaments were 45 mm in diameter and any board up to 100 mm by 100 mm costs the same.
Assembly
The boards arrived panelized as I wanted, with four boards per panel. I ordered five panels each in red and green, so I had enough boards to make 40 ornaments., far more than I actually planned to.
I did not order a stencil to administer solder paste for this board, since I figured I could hand solder all the components because even the 555 had a decent pitch (spacing) of pins that it wouldn’t be hard. When came to actually hand soldering all the parts on it wasn’t to difficult with tweezers and my iron. I soldered the 555s using “track” or “drag” soldering where I flooded solder across all the pins and then removed the excess with solder braid/wick.
Testing and 555 Issue
After assembling my first one I tried to power it on and have it blink. Unfortunately it didn’t, the LEDs the 555 controlled never lit up. I tried to make a second, but this time the LEDs the 555 controlled we held perpetually high. So I started to investigate what I was doing wrong.
My first suspicion was that I was over heating the 555s when I was soldering them, since I was running my iron at 350 °C (~660 °F) to melt my lead-free solder and applying heat for a long period time to drag solder its leads. To see if this was true I made a ornament using leaded solder and running my soldering iron at a lower temperature of 300 °C (~570 °F). This did the trick, and I was able to assemble the rest of my boards without issue like this.
Deployment
Once they were assembled using a lower temperature to solder the 555s, they all worked and I prepared string loops for each and handed them out to my friends and family.